Secure Digital (SD) cards are widely used to store data on devices like cameras, smartphones, tablets, and computers. However, sometimes you may encounter an issue where you can’t delete or modify files on the SD card because it is write-protected. Write protection can be both a feature and a frustration. Thankfully, there are several ways to remove this limitation when needed.
TL;DR (Too Long; Didn’t Read)
Write protection on an SD card prevents any changes from being made to the card’s contents. This restriction might be mechanical, software-based, or caused by corruption or damage. Fortunately, you can disable write protection in several ways: by flipping a physical switch, using disk management tools, editing the Windows Registry, or formatting the card. Always backup your data before making significant changes.
Understanding Write Protection
Write protection is a security mechanism that restricts data modification on a storage device. When it’s enabled, the SD card becomes read-only. This may serve to:
- Prevent data from being accidentally deleted or modified
- Protect the device from malware or unauthorized access
- Indicate card corruption or that it has reached the end of its life cycle
Write protection can be either physical or digital. Identifying the type is the first step to removing it.
1. Check the Physical Lock Switch
Most full-size SD cards (not microSDs) come with a mechanical switch on the left side. When pushed down (toward the “Lock” label), it enables write protection.
Steps to remove physical write protection:
- Take the SD card out of its device
- Locate the small switch on the side of the card
- Push the switch up to disable the lock
- Reinsert the card into your device or card reader
If you are using a microSD card with an adapter, ensure the adapter’s switch is also in the unlocked position. Note that some older or heavily used cards may have a loose switch, which could result in the card appearing locked even when it’s not.
2. Try the Card on Another Device
If the write protection isn’t physical, testing the card on another device—such as another PC, phone, or camera—can help verify whether the problem is device-specific.
If the card is writable on a different device, it’s likely that your original hardware or software is applying a digital lock. If it’s still read-only, proceed with more technical methods below.
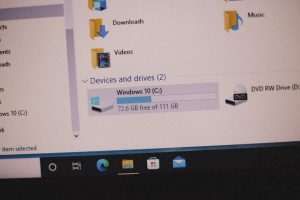
3. Use Diskpart (Windows)
Windows includes an advanced command-line tool called Diskpart that can disable certain types of write protection.
How to use Diskpart:
- Insert the SD card into your PC’s card reader
- Type cmd in the Windows Start Menu, right-click Command Prompt, and choose Run as administrator
- In the Command Prompt, enter the following commands:
diskpartlist disk- Identify your SD card by size and type
select disk X(replace X with your card number) - Then enter
attributes disk clear readonly - Type
exitto close Diskpart - Eject and reinsert your SD card
This method removes software write protection applied by some applications or the operating system.
4. Edit Windows Registry (Advanced Users)
If Diskpart doesn’t work, there might be a registry key forcing write protection. This method should only be used by those comfortable working with Windows Registry Editor.
Proceed with caution and back up the registry before making changes.
Steps:
- Press Windows + R, type regedit, and hit Enter
- Navigate to:
HKEY_LOCAL_MACHINE\SYSTEM\CurrentControlSet\Control\StorageDevicePolicies - If there is a key named WriteProtect, double-click it
- Change the value from 1 to 0
- Click OK and restart the computer
If StorageDevicePolicies doesn’t exist, you can manually create the key and DWORD value, then set it to 0.
5. Format the SD Card (Last Resort)
If all else fails, formatting the card may be your only option. This will erase all data, so be sure you back up important files beforehand.
Formatting using Windows:
- Right-click the SD card in File Explorer
- Choose Format
- Select file system (usually FAT32 or exFAT), uncheck “Quick Format” for a deeper clean
- Click Start
A successful format usually clears up any write protection issues caused by corruption or configuration errors.

6. Use a Third-Party SD Card Tool
Several free and premium utilities can manage SD cards and remove write protection. Examples include:
- SD Formatter – Official tool by the SD Association
- EaseUS Partition Master
- MiniTool Partition Wizard
These also offer error checking, resizing partitions, and file system conversion alongside write protection management.
7. Check for Errors or Damage
If your SD card continues to be write-protected even after software and hardware methods, it might be damaged or close to failure.
Diagnostics tools to try:
- chkdsk (Check Disk)
- H2testw
- CrystalDiskInfo (for some card readers)
To run chkdsk, open Command Prompt as administrator and type:
chkdsk X: /f /r
(Replace X: with your SD card’s drive letter)
If the card has too many bad sectors the operating system might enable write protection as a safeguard.
Tips to Prevent Future Write Protection Issues
- Always use the “Eject” feature before removing the card
- Avoid filling the card to 100% capacity
- Don’t expose the card to heat, moisture, or magnetic fields
- Use high-quality branded cards to reduce failure rates
Conclusion
Write protection might be a safety measure, or it might signal a deeper issue with your SD card. By identifying the cause—whether it’s physical, software-based, or due to card failure—you can choose the appropriate method to disable write restrictions. While there are several safe techniques available, always be careful when using advanced system tools like Diskpart or Registry Editor. If none of these solutions resolves the issue, it may be time to replace the SD card entirely.
With the right approach and caution, you can regain full access to your SD card and use it reliably once again.