In the vast landscape of networking, understanding the fundamentals is essential for maintaining and optimizing your internet connection. One key piece of information that often comes into play is your router’s IP address. Whether you’re troubleshooting network issues, configuring settings, or enhancing security, knowing how to find your router’s IP address is a fundamental skill. In this comprehensive guide, we’ll walk through the various methods and steps to help you easily locate your router’s IP address.
What is a Router IP Address?
Before delving into the methods of finding your router’s IP address, it’s crucial to grasp the concept of an IP address. An IP address, or Internet Protocol address, serves as a unique identifier for devices on a network. In the context of a router, it has two primary IP addresses:
1. Local IP Address
This is the internal IP address assigned to your router within your local network. It allows devices within your home network to communicate with the router and access the internet.
2. Public IP Address
The public IP address is assigned by your Internet Service Provider (ISP) and is used to identify your router on the broader Internet. It facilitates communication between your home network and external servers.
Methods to Find Your Router’s IP Address:
Method 1: Check the Router’s Label
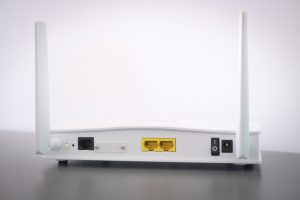
1. Physical Label
Most routers have a label affixed to them that contains essential information, including the router’s IP address. Check the bottom or back of your router for a sticker or label. The IP address is often labeled as “Router IP,” “Gateway,” or “Default Gateway.”
Method 2: Use the Command Prompt (Windows):
1. Open Command Prompt:
– Press `Win + R` to open the Run dialog.
– Type “cmd” and press Enter to open the Command Prompt.
2. Enter Command:
– In the Command Prompt window, type the following command and press Enter:
“`
ipconfig
“`
3. Find Default Gateway:
– Look for the “Default Gateway” entry. The number next to it is your router’s local IP address.

Method 3: Use the Terminal (Mac):
1. Open Terminal:
– Press `Cmd + Space` to open Spotlight.
– Type “Terminal” and press Enter to open the Terminal.
2. Enter Command:
– In the Terminal window, type the following command and press Enter:
“`
netstat -nr | grep default
“`
3. Find Default Gateway:
– The IP address next to “default” is your router’s local IP address.
Method 4: Check Network Settings (Windows and Mac):
1. Windows:
– Right-click on the network icon in the system tray.
– Select “Open Network & Internet settings.”
– Click on “Change adapter options.”
– Right-click on your active network connection and select “Status.”
– Click on “Details,” and the Default Gateway field will display your router’s IP address.
2. Mac:
– Click on the Apple logo and select “System Preferences.”
– Choose “Network.”
– Select your active network connection (Wi-Fi or Ethernet).
– Click on “Advanced” and go to the “TCP/IP” tab. The Router field will display your router’s IP address.
Understanding Router Models and Default IPs:
It’s worth noting that different router models might have default IP addresses set by the manufacturer. The most common default IPs are:
– 192.168.0.1
– 192.168.1.1
– 192.168.2.1
If you don’t find your router’s IP address using the methods mentioned above, you can try entering these defaults in your web browser’s address bar.
Accessing the Router’s Admin Panel:
Once you have identified your router’s IP address, you can access its admin panel through a web browser. Follow these general steps:
1. Open a Web Browser:
– Open your preferred web browser (Chrome, Firefox, Safari, etc.).
2. Enter the Router’s IP Address:
– In the address bar, type the router’s IP address and press Enter.
3. Enter Login Credentials:
– You’ll be prompted to enter the router’s login credentials. Common defaults are “admin” for both the username and password, but you may need to consult your router’s manual or the aforementioned label for the correct credentials.
What Can You Do in the Router’s Admin Panel?
Accessing the router’s admin panel provides you with a range of options to configure and manage your home network. Some common actions include:
1. Change Wi-Fi Password:
– Navigate to the Wireless or Wi-Fi settings to change your network’s password.
2. Update Firmware:
– Check for and install firmware updates to ensure your router has the latest security patches and features.
3. View Connected Devices:
– Many routers allow you to see a list of devices connected to your network. This is useful for monitoring and managing connected devices.
4. Configure Port Forwarding:
– If you’re running services that require external access (
like a gaming server), you can configure port forwarding in the router’s settings.
5. Enhance Security Settings:
– Adjust security settings, such as enabling WPA3 encryption for Wi-Fi or changing the router’s login credentials.
Finding your router’s IP address is a fundamental skill for anyone looking to manage and optimize their home network. Whether you’re troubleshooting connectivity issues or configuring advanced settings, understanding how to locate and access your router’s admin panel is essential. By following the methods outlined in this comprehensive guide, you’ll be well-equipped to navigate the digital terrain of your home network and ensure a smooth online experience. Remember to handle router settings with care and refer to your router’s manual for specific details related to your device model.