Snap Camera, a versatile tool developed by Snap Inc., allows users to use Snapchat filters and lenses in video calls, live streaming, and more. While the concept is fun and straightforward, users on both Windows and Mac sometimes encounter technical issues where Snap Camera simply refuses to work. Whether it’s a black screen, your webcam not connecting, or Snap Camera not being recognized by apps like Zoom or OBS, these issues can be frustrating. Fortunately, most of them can be resolved with a few simple steps.
In this comprehensive guide, we’ll walk you through all the possible methods to fix Snap Camera not working on Windows or Mac, ensuring you’re back to using your favorite lenses in no time!
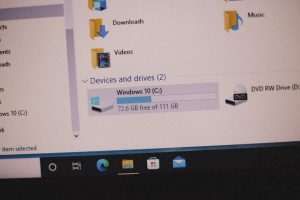
1. Check System Requirements
Before diving into more technical fixes, make sure that your system meets the minimum requirements for Snap Camera. Snap Camera requires:
- For Windows: Windows 10 (64-bit) or newer
- For Mac: macOS 10.13 (High Sierra) or newer
- At least 4 GB of RAM (8 GB recommended)
- A working webcam
If your system doesn’t meet these requirements, Snap Camera may not function properly.
2. Restart Snap Camera and Your Computer
This might sound basic, but a simple restart can fix a surprising number of issues by resetting internal processes.
- Quit Snap Camera completely by right-clicking the icon in the system tray (Windows) or menu bar (Mac) and selecting “Quit”.
- Restart your computer.
- Launch Snap Camera again and test it with your video conferencing app.
3. Choose the Correct Camera
If you have multiple webcams or virtual cameras installed, Snap Camera may not have selected the correct input source. To set the right camera:
- Open Snap Camera.
- Click the gear icon (Settings) on the top right corner.
- Under Choose your camera, select the webcam you want to use.
4. Make Sure Snap Camera Is Selected in Other Apps
Even if Snap Camera is working, it won’t appear in video chat apps until it’s chosen as the video source. Here’s how to select it in popular apps:
- Zoom: Go to Settings > Video and choose Snap Camera from the dropdown.
- OBS: Add a new Video Capture Device source and select Snap Camera.
- Google Meet: Click the gear icon on the meeting screen, go to Video, and choose Snap Camera.
5. Allow Camera Permissions
If Snap Camera can’t access your webcam, it won’t be able to function. Make sure that camera permissions are granted:
On Windows:
- Go to Settings > Privacy > Camera.
- Ensure “Allow apps to access your camera” is turned ON.
- Scroll down and verify that Snap Camera is allowed.
On Mac:
- Go to System Preferences > Security & Privacy > Camera.
- Make sure Snap Camera is checked.
6. Close Conflicting Apps
Only one application at a time can use your camera. If another app like Skype, Zoom, or a browser-based tool is already using the webcam, Snap Camera won’t function.
To fix this:
- Close all other apps that may use the webcam.
- Restart Snap Camera.
- Open the app where you want to use Snap Camera.
7. Reinstall Snap Camera
If nothing else works, it might be time to uninstall and reinstall Snap Camera:
On Windows and Mac:
- Quit Snap Camera.
- Uninstall the app using normal procedures via Settings > Apps (Windows) or drag it to the trash (Mac).
- Download the latest version from the official Snap Camera website.
- Install and launch the application again.
8. Update Graphics Drivers and Operating System
Outdated software can cause compatibility issues:
On Windows:
- Update Windows via Settings > Update & Security.
- Update your graphics drivers using Device Manager or software like NVIDIA GeForce Experience or AMD Radeon Settings.
On Mac:
- Go to System Preferences > Software Update and install updates if available.
9. Clear Snap Camera Cache
If Snap Camera starts but behaves unpredictably (like freezing or loading lenses slowly), clearing its cache might help:
For Windows:
- Close Snap Camera.
- Go to
C:\Users\YourUsername\AppData\Roaming\Snap. - Delete or rename the
Snap Camerafolder.
For Mac:
- Close Snap Camera.
- Open Finder > Go > Go to Folder, enter
~/Library/Application Support/Snap. - Delete or rename the
Snap Camerafolder.
10. Use Alternative Camera Tools (If Needed)
If Snap Camera is still not working or it’s been discontinued (as Snap Inc. officially stopped support in early 2023), you can use alternatives such as:
- ManyCam – Offers webcam filters and background effects.
- Spark AR – Designed for Facebook and Instagram filters but can be used creatively.
- OBS Studio – For more advanced customization and effects.
These tools provide similar functionalities and may even be more stable, depending on your system.
11. Bonus: Snap Camera Tips for Better Performance
- Disable HD mode in video conferencing to improve speed.
- Close unnecessary tabs and applications to free up RAM.
- Use a wired internet connection for optimal video streaming performance.
Conclusion
Snap Camera can add a lot of fun and personality to your video chats, but when it stops working, it can be a real headache. By following this step-by-step guide, you can identify and resolve the most common issues—whether you’re on Windows or Mac. From checking camera permissions to reinstalling the app and clearing cache data, these solutions cover everything you need to get Snap Camera running smoothly again.
If none of these steps work, it might be time to consider alternative tools or even seek assistance from Snap’s support forums and communities.
With a little patience and troubleshooting, your filters and effects will be back on screen, adding that extra sparkle to every call!